All you need to know
I have a question about Nexo prices, accessories and/or spare parts
- For questions about prices of Mutsy products, please contact the Mutsy sales outlets
- Mutsy is unable to supply accessories and spare parts directly to consumers. For spare parts and accessories please visit the Mutsy sales outlets. In the event of more complex questions, the store owner will contact Mutsy.
Search here for a retailer in your area: sales points
How old must my child be in order to use the seat? How much weight can it carry?
You can use the stroller from 6 months until the child has reached a weight of 22 kg.
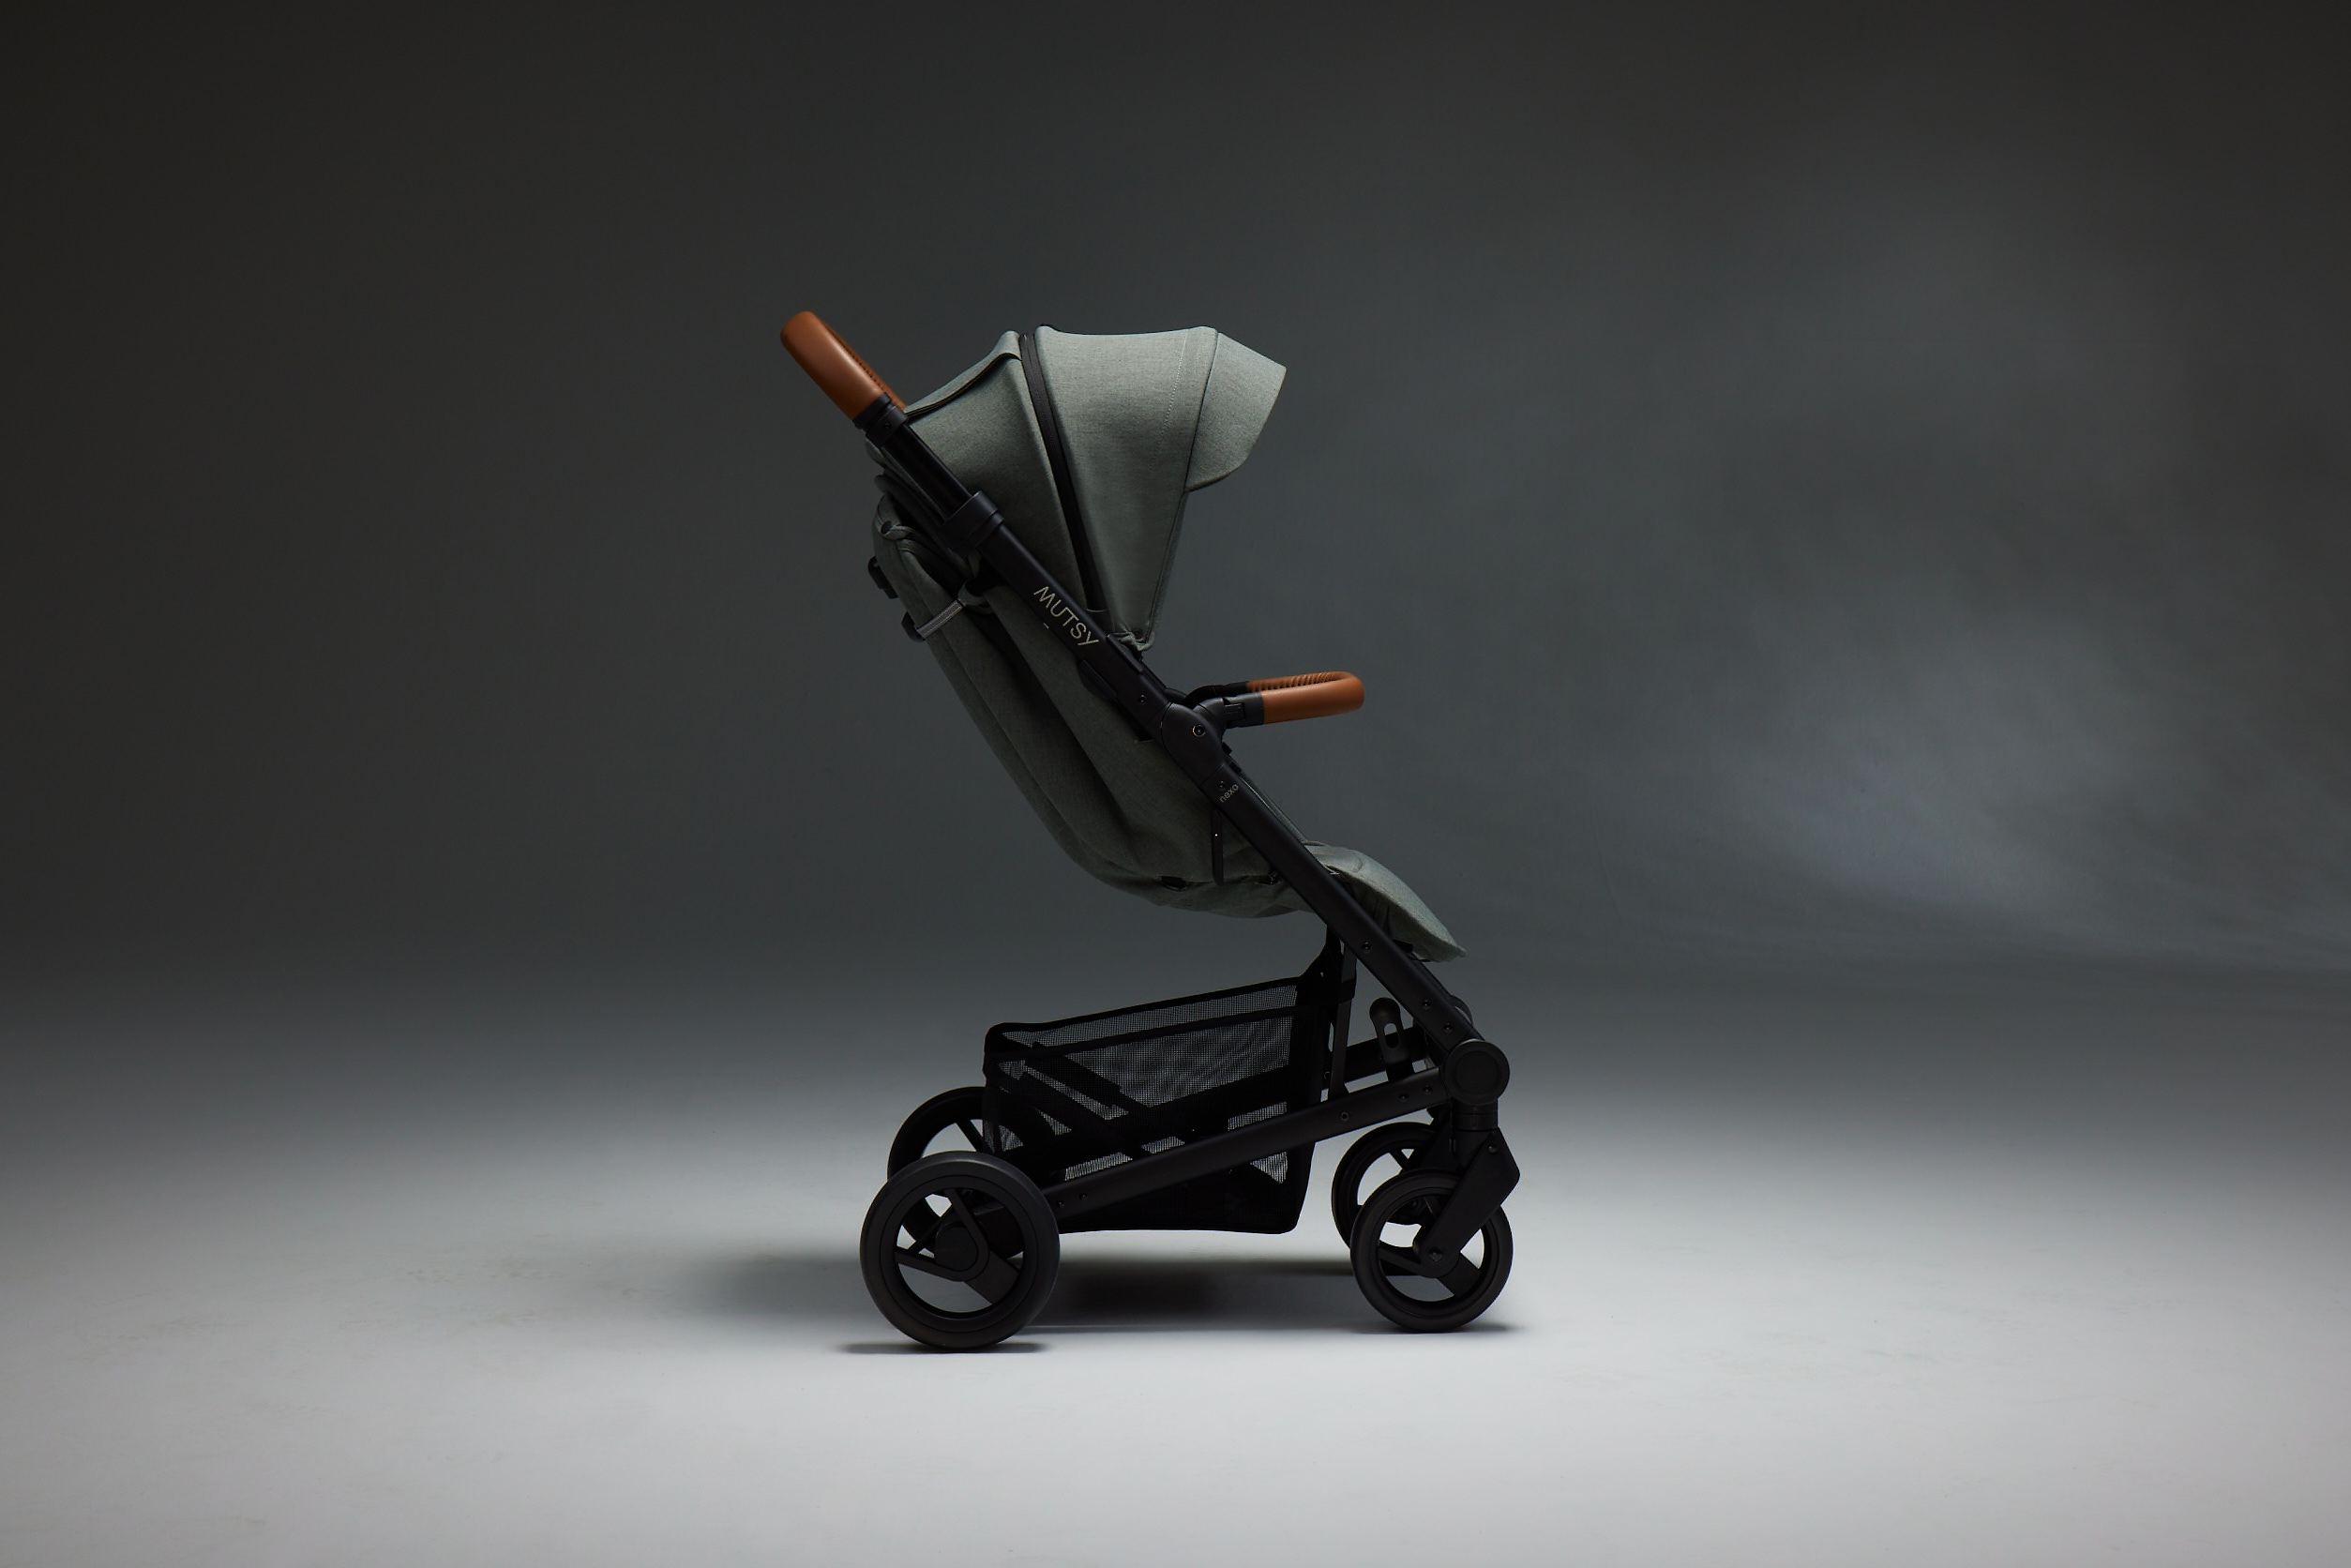
How to fold and unfold my Mutsy Nexo?
- Unfolding the frame: push the frame lock inwards and push the upper part of the frame up until you hear a click. Press the buttons on both sides of the push bar and twist the push bar up. The push bar is adjustable in 4 height settings. Release the buttons when the push bar is in the desired position. With every use of the stroller: check whether the stroller is correctly unfolded and safely locked.
- Folding the frame: stand behind the frame and put the brake on. Press the height adjustment buttons on both sides of the frame and twist the push bar downwards until it’s at its lowest position. This position is marked in the pivot point. Pull the unlocking buttons on the inside towards you and then push the upper part of the frame downwards. The frame will lock automatically. If you lock the swivel wheels before folding, the frame will be even more compact.
How can I adjust the seat?
- Adjusting the seat: pull the button at the back of the seat up while you reposition the back rest into the desired position.
- Adjusting the leg rest: pull the leg rest up or press the buttons when pushing it down while putting the foot rest in the desired position.
- Adjusting the foot rest: open the zipper around the leg rest of the seat to provide a higher leg rest. The child can rest its feet on the aluminium bar of the rest. Close the zipper for increased comfort for larger children; they can then place their feet on the plastic foot rest.
How much weight can the shopping basket carry?
The Nexo basket at the base of the frame can carry a weight of 5 kg.
How do I adjust the 5 point safety harness?
- To adjust the length of the shoulder straps, loosen the shoulder protectors from the belt by undoing the snap buttons. This will reveal the belt buckles. Adjust the length by sliding the buckles along both shoulder straps until your child is comfortably secure. After adjusting, press down both snap buttons to relock the shoulder protectors in place.
- The back support contains three positions for the shoulder belts. To adjust the position you remove both shoulder belts by moving the attachment rings through the openings in the back of the seat. Move the attachment rings through the desired openings so that the shoulder belts are positioned properly.
- Regularly check the length and position of the belts and adjust, where necessary.
- If the waist or crotch strap needs to be reassembled move the attachment ring through the corresponding opening.
Is it possible to order lining in another colour separately?
Unfortunately you cannot order any lining separately.
How should I clean the lining?
- Removable fabric parts (only consisting of fabric) can be washed in the washing machine on a wool cycle at 30°C. Wash without bleaching agent and do not put in the tumble dryer. Do not iron or dry clean. Before washing fasten all zips, velcro and poppers.
This includes: Travel cot lining, seat covers, mattress cover, the fabric parts of the 5-point belt, foot muff, safe2go seat cover. - You can treat stains on the outer fabric or lining of non-removable parts (or fabric parts that are combined with other materials) using a liquid, bleach-free soap. Always treat the whole area.This includes: the seat cover, the canopy, the carry cot cover itself, the storage compartment, the cover and the safe2go inlay, the pram booth cover, nursery bag and parasol.
- The mattress can be carefully hand washed with lukewarm water. Do not use soap. Do not machine wash, do not tumble dry, do not iron and do not dry clean.
May my Mutsy product become wet from rain or snow?
Mutsy fabrics are chosen and tested to be water resistant, but when the product gets really soaked, water can leave traces on the fabric. We would advise you to always use the dedicated rain covers to prevent this from happening
Do I need to oil/lubricate the moving parts and wheels?
- Never use oil to lubricate the wheels. You can use an acid-free Vaseline to keep the wheels rolling smoothly.
- Use a Teflon spray to lubricate other moving parts. Rub it in with a soft cloth.
- Make sure the locking mechanism and the swivel mechanism are treated with Teflon spray regularly.
- Also treat the areas that make contact with the locking and swivel mechanisms.
How do I install/remove the wheels?
- Installing the back wheels on the Nexo: place the axis of the wheel over the back axis mount. Pull the wheel to check whether it is fastened tightly.
- Installing the front wheels of the Nexo: shift the axis of the front wheels upwards over the axis mount until they click tight. Pull the wheel to check whether it is fastened.
- Removing the Nexo back wheels: push the button in the middle of the wheel and pull the wheel axis out of the tube.
- Removing the front wheels of the Nexo: push the button on the front of the wheels and pull the wheel out of the mount.
Why do the foam tyres lose their shape and become flat after some time?
Flattening of foam tyres is normal wear and tear; the same as shoe soles for example, which also wear through use. The wear depends on user conditions; temperature, ground, frequency of use, weather conditions, load, etc. The advantages of foam tyres continue to be intact, however: they never leak and are lightweight.
How do I assemble and disassemble the Nexo basket?
Disassembly:
- Undo the three press studs on the webbing that secures the basket to the rear axle at three points
- The basket is secured to the chassis at two points on both sides. Undo the press studs on the webbing.
- At the front of the basket there are 2 button clips attached to 2 elastic bands. Push the button clips vertically through the gaps out of the cylinders that are secured to the chassis.
Assembly:
- At the front of the basket there are 2 button clips attached to 2 elastic bands. Secure the button clips to the cylinders of the chassis: Press the button clip vertically with the gap to the cylinder until it clicks into place.
- The basket is secured to the chassis at two points on both sides. Make a loop around the chassis tube with the webbing and secure the press studs.
- Secure the three press studs on the webbing that secures the basket to the rear axle at three points
How do I secure the Nexo footmuff?
- Undo the bumper bar in order to create more space. Undo the shoulder belt from the hip belt. Do this by pushing the shoulder belts sideways from the insertion point on the hip belt. Place the footmuff in the seat and open the zip.
- On top of the footmuff, there are two press-studs on each side. The attachment points for these press-studs are located on the back of the back support. These can be found by undoing the back of the cover. Secure the footmuff to the back support with the press-studs.
- Place the bumper bar back on the seat and re-attach the cover to the back support.
Which car seats are compatible with the Mutsy Nexo?
+ adapter Safe2go:
- Mutsy: Safe2go
+ adapter Maxi-Cosi:
- Maxi-Cosi: Pebble Plus, Pebble, Cabriofix, Citi
- Kiddy: Evolution Pro, Evolution Pro 2, Evo–luna i-size
- Cybex: Aton, Aton 4, Aton Q
- Besafe: iZi Go (x1), iZi Go Modular
For Australia:
+ adapter Maxi-Cosi:
- Maxi-Cosi car seats (Citi, Mico)
How do I attach the car seat adapters?
- The adapter marked ‘R’ is placed on the right side on the frame, the adapter marked ‘L’ is placed on the left.
- Remove the front bracket and hood.
There is an opening on the front of the adapter. From the outside, insert the adapter’s opening around the cam on the frame. Turn the top of the adapter inwards until it clicks into place. Check that the adapter is firmly fixed by trying to lift it off the frame.